Long-Term Pavement Performance Program Manual for Falling Weight Deflectometer Measurements
Appendix A: Diagramsof Fwd Test Plans
This appendix contains the 11 diagrams of the FWD test plans.
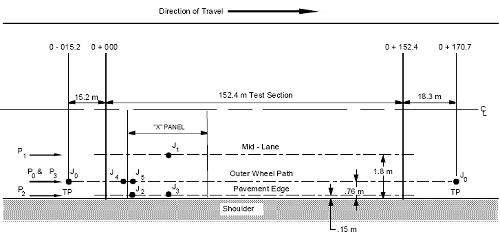
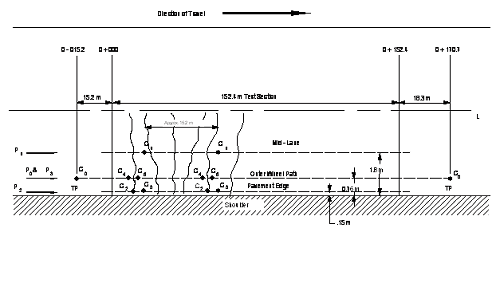
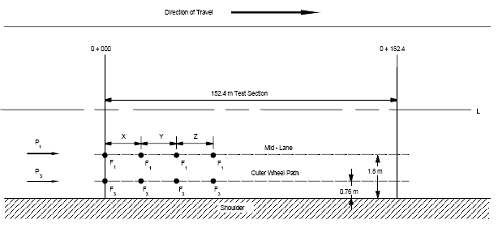
Figure 3. Diagram. Test plan 1.
| NOTES: | |
| | - FWD tests to be conducted at test pit locations (TP) on P0 (First set of tests).
- See Table A-1 for further details.
- Lateral offsets shown represent nominal distances.
|
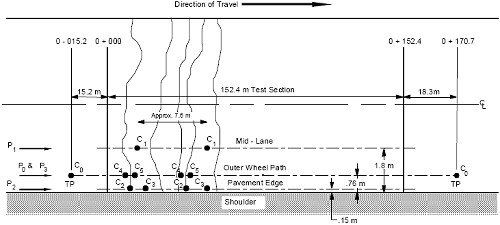
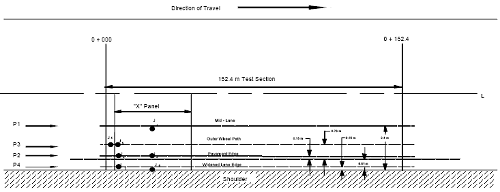
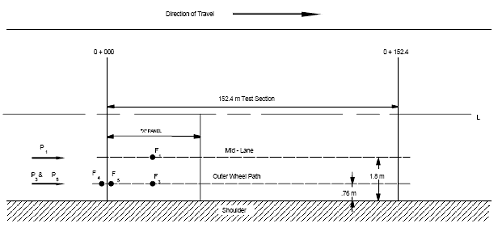
Figure 4. Diagram. Test plan 2.
| NOTES: | |
| | - FWD tests (J0) conducted at test pit locations (TP) on P0 (First set of tests). Stationing will vary to locate TP at midpanel.
- Number of panels and panel length (X) will vary depending upon specific joint spacing, transverse crack pattern and pavement type. Operator should refer to test and Table 1 for further details. A maximum of 20 effective slabs (panels) should be tested.
- Lateral offsets shown represent nominal distances.
|
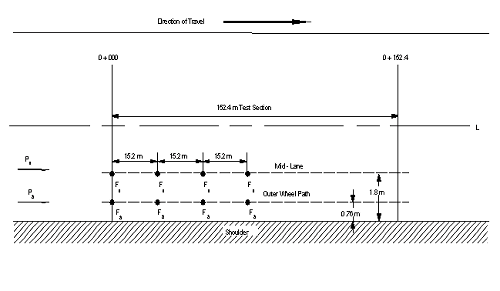
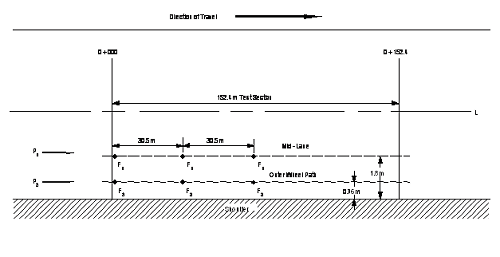
Figure 5. Diagram. Test plan 3.
| NOTES: | |
- FWD tests conducted at test pit locations (TP) on P0 (First set of tests).
- See Table 1 for further details.
- Lateral offsets shown represent nominal distances.
|
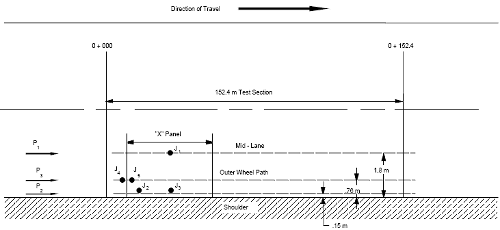
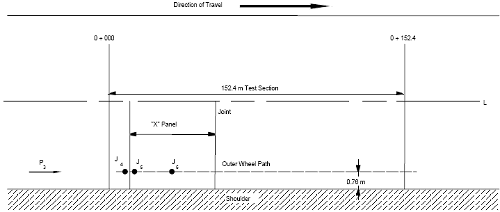
Figure 6. Diagram. Test plan 4.
Figure 7. Diagram. Test plan 5.
| NOTES: | |
- Five test points per panel done in three passes.
- Ten panels should be tested on all sections.
|
Figure 8. Diagram. Test plan 6.
Figure 9. Diagram. Test plan 7.
| NOTES: |
- Ten panels should be tested on all sections.
- Seven test points per panel done in four passes.
- Lane specifications J7 and J8 are on shoulder.
- Lateral offsets shown represent nominal distances.
|
Figure 10. Diagram. Test plan 8.
Figure 11. Diagram. Test plan 9.
| NOTES: |
- Panel Length "X" will be variable depending upon specific joint spacing, transverse crack pattern and pavement type.
- Test all panels on under seal sections and every third panel on remaining sections.
- Lateral Offsets shown represent Nominal Distances.
|
Figure 12. Diagram. Test plan 10.
Figure 13. Diagram. Test plan 11.
Previous | Contents | Next