U.S. Department of Transportation
Federal Highway Administration
1200 New Jersey Avenue, SE
Washington, DC 20590
202-366-4000
Federal Highway Administration Research and Technology
Coordinating, Developing, and Delivering Highway Transportation Innovations
 |
| This report is an archived publication and may contain dated technical, contact, and link information |
|
Publication Number: FHWA-HRT-06-089
Date: July 2006 |
PBCAT-Pedestrian and Bicycle Crash Analysis ToolVersion 2.0PDF Version (14.7 MB) PDF files can be viewed with the Acrobat® Reader®
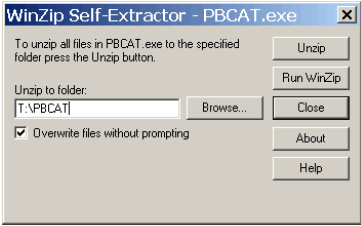
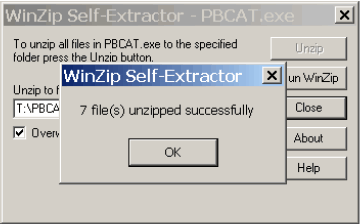
APPENDIX A: INSTALLATION INSTRUCTIONSThis appendix includes step-by-step instructions for installing the software after it has been downloaded from the Web site. All screens that will appear during the installation are shown, including the ones that will appear if the .NET framework or an updated version of the Microsoft® Data Access Components (MDAC) is required. Step 1 – Double click on the downloaded PBCAT.exe file to open the WinZip® Self-Extractor window. Browse to the folder where the files are to be extracted. Click Unzip (see figure 98). When finished, a window will appear indicating that seven files were unzipped successfully (figure 99).
Figure 98. Step 1.
Figure 99. Step 1 completed.
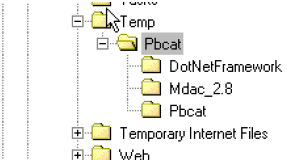
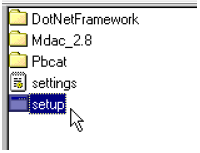
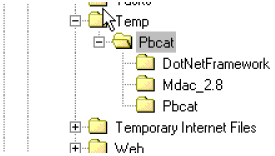
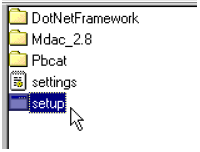
Step 2 – Browse to the folder where the files were written (unzipped) (figure 100). Double click the setup.exe file as seen in figure 101.
Figure 100. Step 2.
Figure 101. Step 2–setup file.
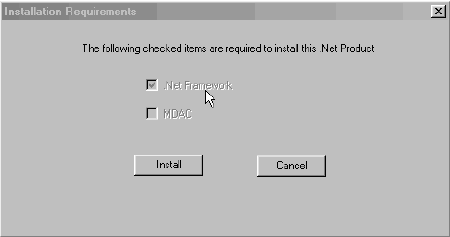
Step 3 – The installation software will check to see if the .NET framework is installed on the computer. If not, it will be installed as indicated in steps 3 through 6, beginning with this screen. Check the box next to .NET Framework and click Install as shown in figure 102.
Figure 102. Step 3.
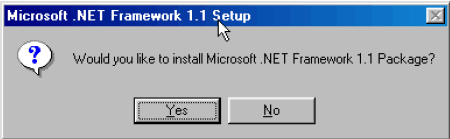
Step 4 – A confirmation screen will appear (figure 103). Click Yes.
Figure 103. Step 4.
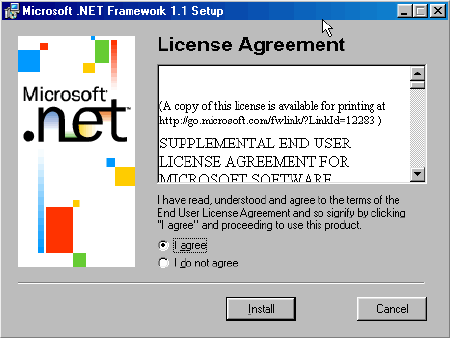
Step 5 – Read the Microsoft.net License Agreement, choose "I agree," and click Install.
Figure 104. Step 5.
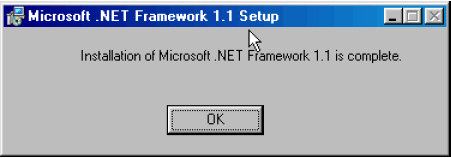
Step 6 – A screen will appear at the completion of the .NET Installation. Click OK(figure 105).
Figure 105. Step 6.
Step 7 – The installation software will also check for the correct version of the MDAC. If detected, Steps 7 through 11 will not be necessary. If the correct version is not detected, the screen in figure 106 will appear. Click Install.
Figure 106. Step 7.
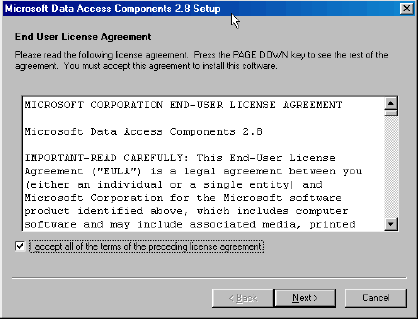
Step 8 – Read the MDAC End User License Agreement (figure 107). Check the "acceptance of terms" box and click Next.
Figure 107. Step 8.
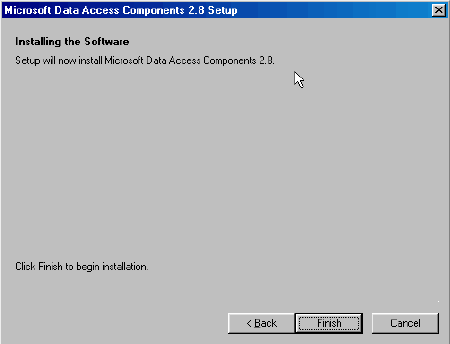
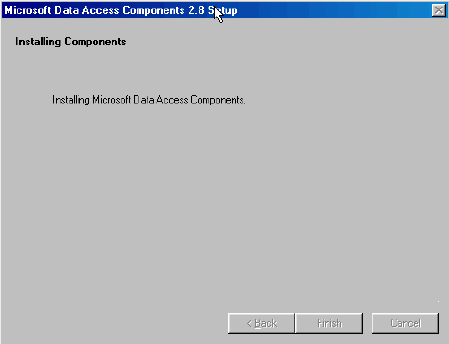
Step 9 – A confirmation screen (figure 108) will appear. Click Finish. Several screens will appear during the installation, including the one shown in figure 109.
Figure 108. Step 9.
Figure 109. Step 9–sample installation screen.
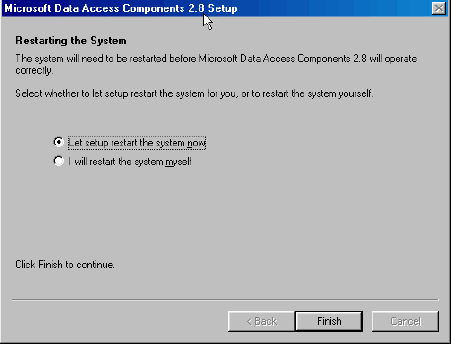
Step 10 – Reboot the computer. Click the radio button, and the the setup application will restart the system now (figure 110). Click Finish.
Figure 110. Step 10.
Step 11 – After rebooting the system, browse to the folder where the files were written (unzipped) again (figure 111). Double click the setup.exe file as shown in figure 112.
Figure 111. Step 11.
Figure 112. Step 11–setup file.
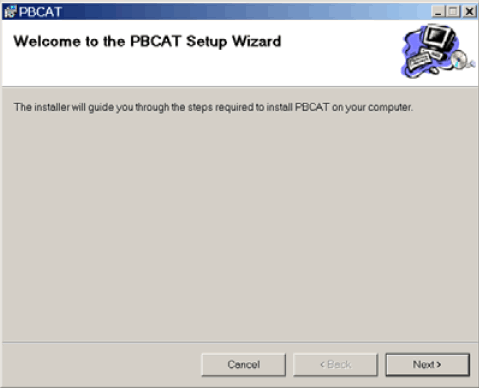
Step 12 – The PBCAT Setup Wizard window will open (figure 113). Click Next.
Figure 113. Step 12.
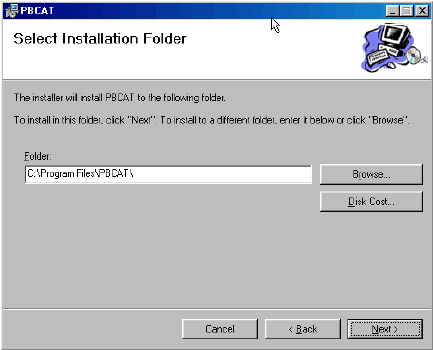
Step 13 – Select the folder where the program is to be installed (figure 114). Use the Browse button to do so. Click Next.
Figure 114. Step 13.
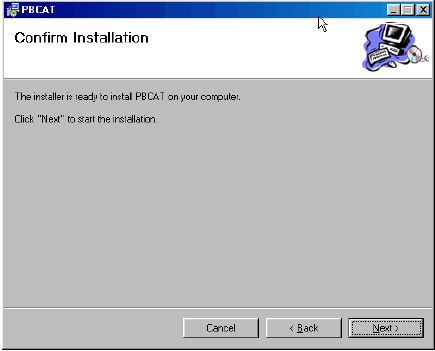
Step 14 – A conformation screen will appear as seen in figure 115. Click Next.
Figure 115. Step 14.
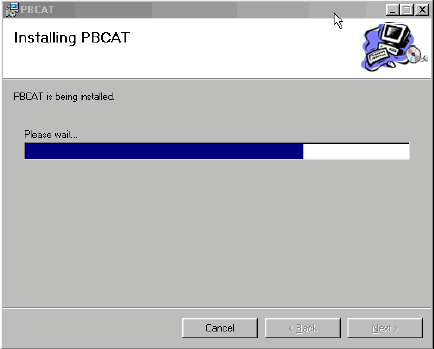
Step 15 – Figure 116 will appear during the installation that includes a progress bar.
Figure 116. Step 15.
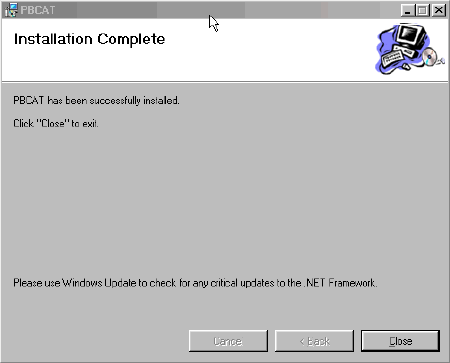
Step 16 – When the installation is completed, click Close. The final screen is in figure 117.
Figure 117. Step 16.
FHWA-HRT-06-089 |