U.S. Department of Transportation
Federal Highway Administration
1200 New Jersey Avenue, SE
Washington, DC 20590
202-366-4000


Skip to content
Facebook iconYouTube iconTwitter iconFlickr iconLinkedInInstagram

Federal Highway Administration Research and Technology
Coordinating, Developing, and Delivering Highway Transportation Innovations

 
REPORT
This report is an archived publication and may contain dated technical, contact, and link information
Back to Publication List        
Publication Number:  FHWA-HRT-14-066    Date:  September 2014
Publication Number: FHWA-HRT-14-066
Date: September 2014


Fatigue Testing of Galvanized and Ungalvanized Socket Connections

APPENDIX: PICTURES OF FRACTURES

The pictures of the fracture surfaces shown in figure 11 through figure 33 are highlighted with green hatching to represent the area of fatigue crack growth. Two dimensions are provided for each hatched area: the length of the crack along the outer tube perimeter (in inches) and area of the crack (inches2).
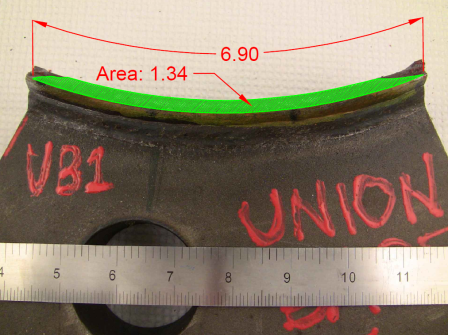
This photo shows the fracture surface. The crack has a total length of 6.90 inches along the outside diameter of the tube and a total area of 1.34 square inches.
Figure 11 . Photo. Specimen 1U1 fracture surface.
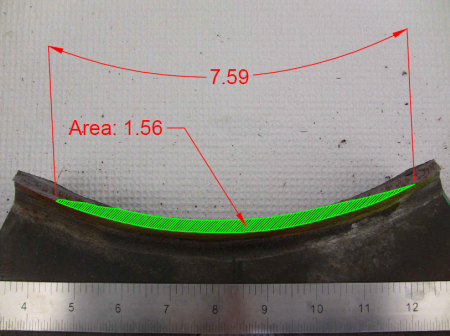
This photo shows the fracture surface. The crack has a total length of 7.59 inches along the outside diameter of the tube and a total area of 1.56 square inches.
Figure 12. Photo. Specimen 1U2 fracture surface.
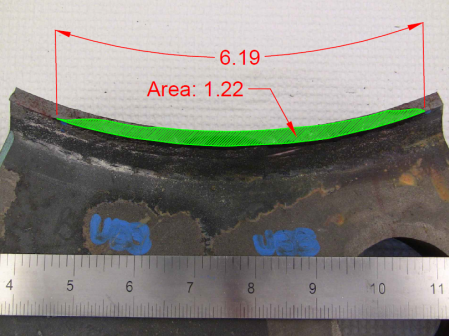
This photo shows the fracture surface. The crack has a total length of 6.19 inches along the outside diameter of the tube and a total area of 1.22 square inches.
Figure 13. Photo. Specimen 1U3 fracture surface.
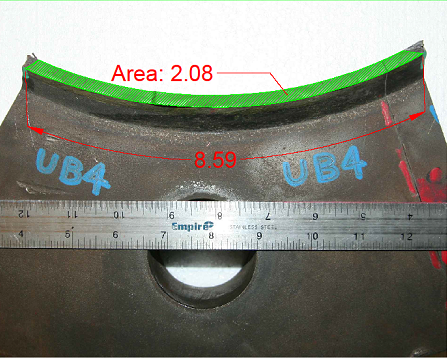
This photo shows the fracture surface. The crack has a total length of 8.59 inches along the outside diameter of the tube and a total area of 2.08 square inches.
Figure 14. Photo. Specimen 1U4 fracture surface.
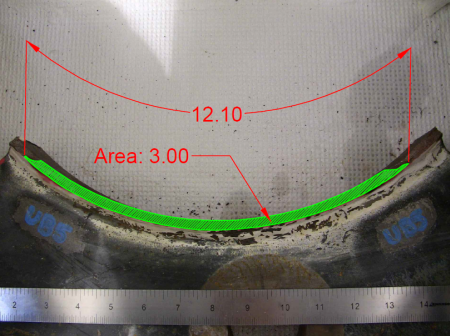
This photo shows the fracture surface. The crack has a total length of 12.10 inches along the outside diameter of the tube and a total area of 3.00 square inches.
Figure 15. Photo. Specimen 1U5 fracture surface.
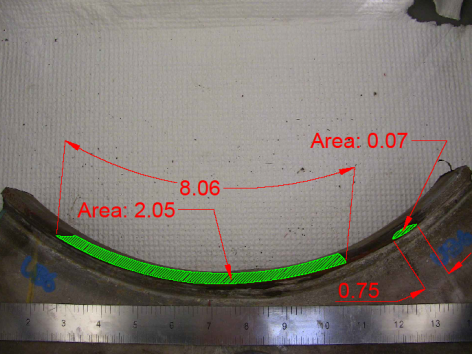
This photo shows the fracture surface. Fatigue cracks had started in two places. The larger crack has a total length of 8.06 inches along the outside diameter of the tube and a total area of 2.05 square inches. About 1 inch to the right of the primary crack is a smaller one that grew elliptically through half the pole wall thickness; it has a length of 0.75 inches on the outside diameter of the tube.
Figure 16. Photo. Specimen 1U6 fracture surface.
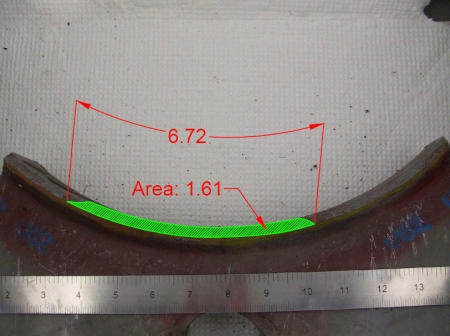
This photo shows the fracture surface. The crack has a total length of 6.72 inches along the outside diameter of the tube and a total area of 1.61 square inches.
Figure 17. Photo. Specimen 1G2 fracture surface.
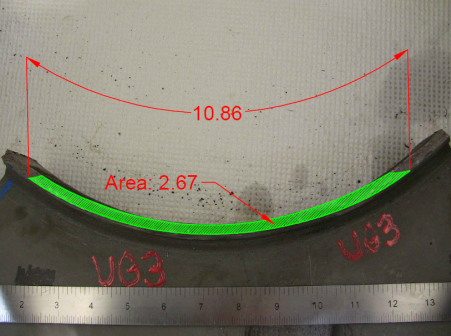
This photo shows the fracture surface. The crack has a total length of 10.86 inches along the outside diameter of the tube and a total area of 2.67 square inches.
Figure 18. Photo. Specimen 1G3 fracture surface.
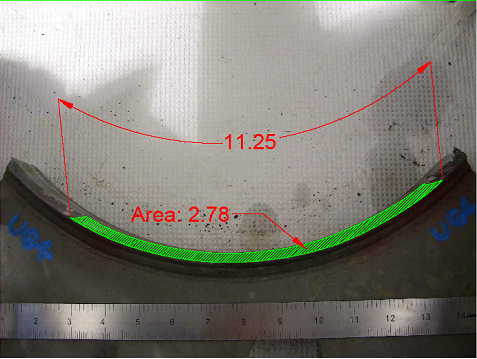
This photo shows the fracture surface. The crack has a total length of 11.25 inches along the outside diameter of the tube and a total area of 2.78 square inches.
Figure 19. Photo. Specimen 1G4 fracture surface.
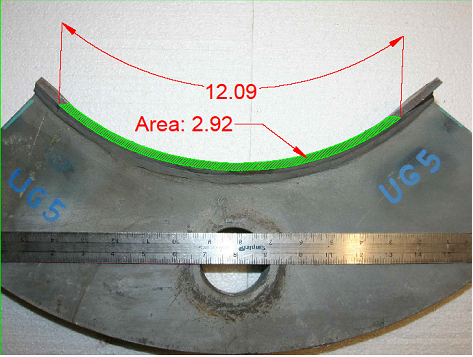
This photo shows the fracture surface. The crack has a total length of 12.09 inches along the outside diameter of the tube and a total area of 2.92 square inches.
Figure 20. Photo. Specimen 1G5 fracture surface.
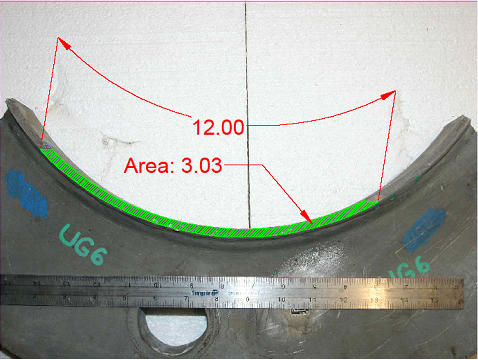
This photo shows the fracture surface. The crack has a total length of 12.00 inches along the outside diameter of the tube and a total area of 3.03 square inches.
Figure 21. Photo. Specimen 1G6 fracture surface.
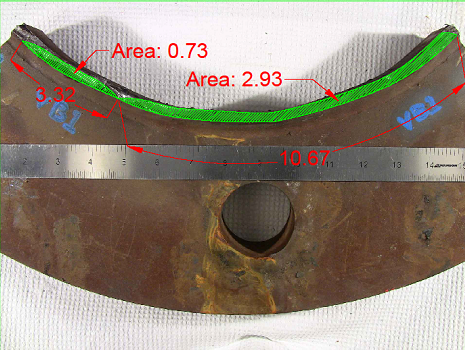
This photo shows the fracture surface. There were two cracks that grew together elliptically, just touching each other at the surface of the tube. The larger crack is 10.67 inches along the outside diameter of the tube and has a total area of 2.93 square inches. The smaller crack is 3.32 inches along the outside of the tube and has a total area of 0.73 square inches.
Figure 22. Photo. Specimen 2U1 fracture surface.
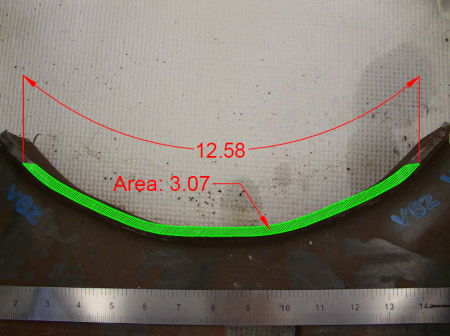
This photo shows the fracture surface. The crack has a total length of 12.58 inches along the outside diameter of the tube and a total area of 3.07 square inches.
Figure 23. Photo. Specimen 2U2 fracture surface.
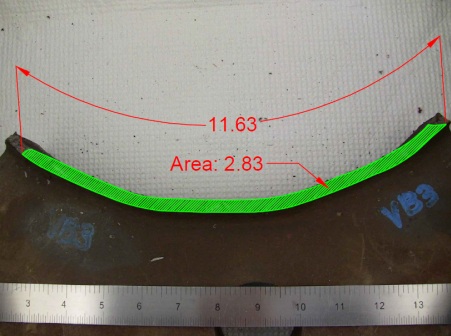
This photo shows the fracture surface. The crack has a total length of 11.63 inches along the outside diameter of the tube and a total area of 2.83 square inches.
Figure 24. Photo. Specimen 2U3 fracture surface.
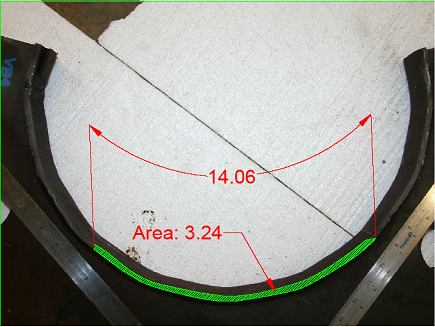
This photo shows the fracture surface. The crack has a total length of 14.06 inches along the outside diameter of the tube and a total area of 3.24 square inches.
Figure 25. Photo. Specimen 2U4 fracture surface.
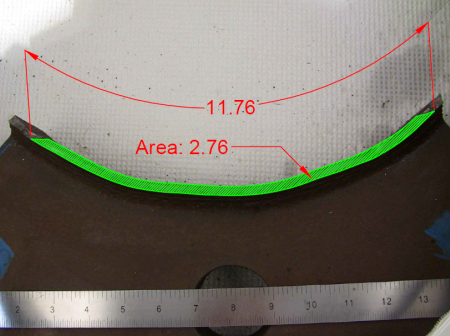
This photo shows the fracture surface. The crack has a total length of 11.76 inches along the outside diameter of the tube and a total area of 2.76 square inches.
Figure 26. Photo. Specimen 2U5 fracture surface.
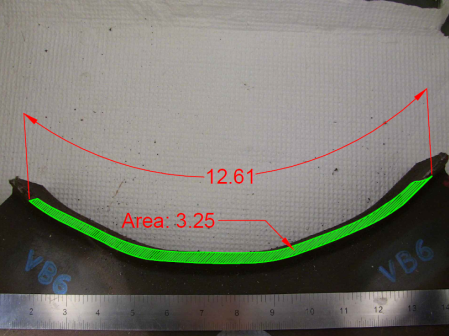
This photo shows the fracture surface. The crack has a total length of 12.61 inches along the outside diameter of the tube and a total area of 3.25 square inches.
Figure 27. Photo. Specimen 2U6 fracture surface.
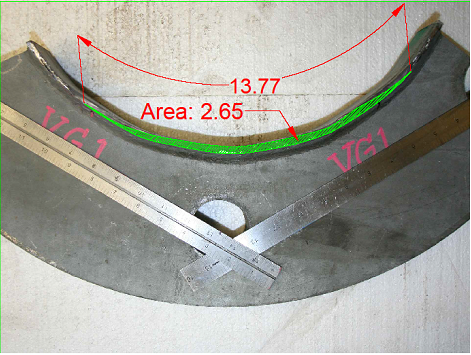
This photo shows the fracture surface. The crack has a total length of 13.77 inches along the outside diameter of the tube and a total area of 2.65 square inches.
Figure 28. Photo. Specimen 2G1 fracture surface.
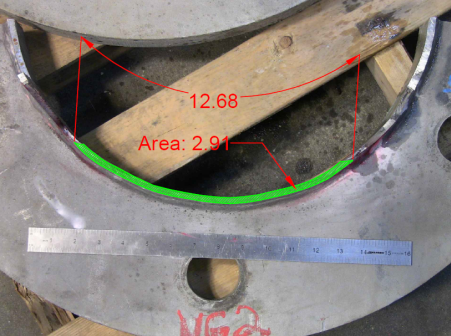
This photo shows the fracture surface. The crack has a total length of 12.68 inches along the outside diameter of the tube and a total area of 2.91 square inches.
Figure 29. Photo. Specimen 2G2 fracture surface.
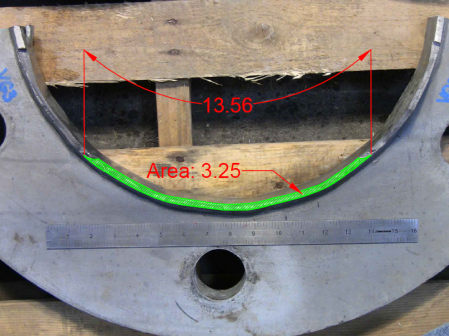
This photo shows the fracture surface. The crack has a total length of 13.56 inches along the outside diameter of the tube and a total area of 3.25 square inches.
Figure 30. Photo. Specimen 2G3 fracture surface.
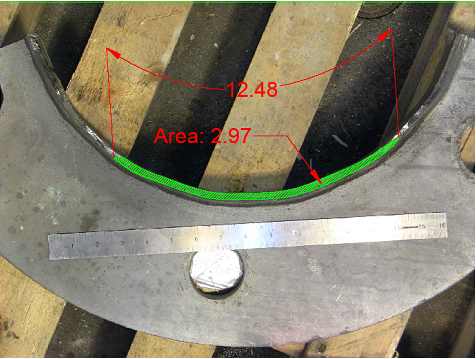
This photo shows the fracture surface. The crack has a total length of 12.48 inches along the outside diameter of the tube and a total area of 2.97 square inches.
Figure 31. Photo. Specimen 2G4 fracture surface.

This photo shows the fracture surface. The crack has a total length of 12.64 inches along the outside diameter of the tube and a total area of 3.02 square inches.
Figure 32. Photo. Specimen 2G5 fracture surface.

This photo shows the fracture surface. The crack has a total length of 11.42 inches along the outside diameter of the tube and a total area of 2.69 square inches.
Figure 33 . Photo. Specimen 2G6 fracture surface.


Federal Highway Administration | 1200 New Jersey Avenue, SE | Washington, DC 20590 | 202-366-4000
Turner-Fairbank Highway Research Center | 6300 Georgetown Pike | McLean, VA | 22101