U.S. Department of Transportation
Federal Highway Administration
1200 New Jersey Avenue, SE
Washington, DC 20590
202-366-4000
Federal Highway Administration Research and Technology
Coordinating, Developing, and Delivering Highway Transportation Innovations
| REPORT |
| This report is an archived publication and may contain dated technical, contact, and link information |
|
| Publication Number: FHWA-HRT-09-040 Date: May 2014 |
Publication Number: FHWA-HRT-09-040 Date: May 2014 |
The first remote monitoring effort conducted during this study involved the thermal monitoring of a drilled shaft. Florida’s bridge substructures have continually grown in size due to the high demand of larger bridges to accommodate the growing population. Typically, drilled shafts were not considered to behave as a mass concrete element due to their smaller size (usually no greater than 4 ft (1.22 m) in diameter). However, with the increase in size of today’s bridge foundations to accommodate longer spans with reduced numbers of collision-prone piers, common sizes of drilled shafts are larger and act as mass concrete elements (such as the 9-ft (2.7-m)-diameter shafts for the Ringling Causeway Bridge in Sarasota, FL). Until recently, these larger diameter shafts have slipped through the concrete specifications without special review for mass concrete effects. Aside from the more widely recognized differential temperature concerns, an equally important issue is the high temperatures that occur during the curing of mass concrete elements. Therein, the delayed ettringite formation can lead to long-term durability reduction where internal cracking initiates in regions that experience elevated curing temperatures.
To combat mass concrete effects in large diameter drilled shafts, researchers at the University of South Florida (USF) in Tampa, FL, proposed and constructed a drilled shaft with a full-length centralized void to mitigate the mass concrete effects exhibited by the foundation element. Benefits from this approach were twofold: (1) to eliminate mass concrete effects in large diameter drilled shafts and (2) to reduce the concrete volume and cost required to construct these foundation elements.
This chapter focuses on the remote thermal monitoring procedure that was used for the research conducted on the USF voided shaft research project. Of particular interest is the installation and instrumentation of the drilled shaft, the thermal monitoring procedure and a review of its efficacy, and the results from the remote thermal monitoring system and its individual parts. More emphasis is placed on the actual monitoring procedure than the results from the voided shaft; however, these thermal results are presented in a summary.
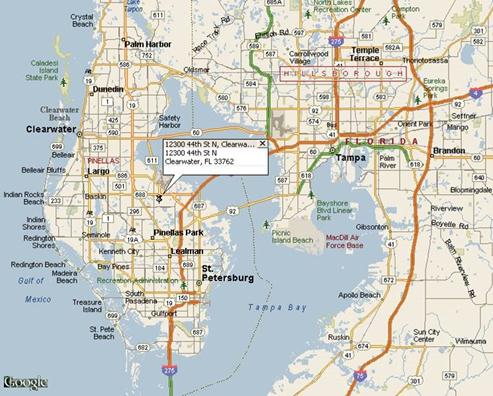
The testing site for the thermal monitoring of the voided shaft was in Clearwater, FL, at the equipment yard (see ©2008 google®figure 18).
©2008 Google®
Figure 18. Illustration. Map of voided shaft testing site.(8)
Prior to the construction of the drilled shaft, the instrumentation for the thermal monitoring was put into place. The first step was the instrumentation of the rebar cage that was installed in the shaft. The reinforcement cage was built using 36 longitudinal bars with 26 #5 stirrups at 12 inches (304.8 mm) on the center. The cage was equipped with nine Schedule 80 polyvinyl chloride (PVC) pipes for thermal testing, which were 26 ft (7.93 m) long and 2 inches (50.8 mm) in diameter (see figure 19). On three of these tubes at 120-degree spacings from each other, thermocouples (TCs) were placed at the top, middle, and bottom of the tubes to provide readings from around the shaft. The inner steel casing (needed to provide the central void in the shaft) was outfitted with three crossbar supports welded to the interior of the casing, which allowed for a central tube to be run through the center of the void for thermal integrity testing (see figure 20). TCs were also placed at the top, middle, and bottom of each side of the inner casing spaced 120 degrees away on the crossbars and attached to the top, middle, and bottom of the central tube (see figure 21). More TCs were placed at the top, middle, and bottom of the outside of the inner casing (see figure 22). In the surrounding soil, ground monitoring tubes were installed at distances corresponding to fractions of the shaft diameter (D); 0.25D, 0.50D, 1D, and 2D away from the edge of the shaft (see figure 23). TCs were also installed with the tubes at these locations.
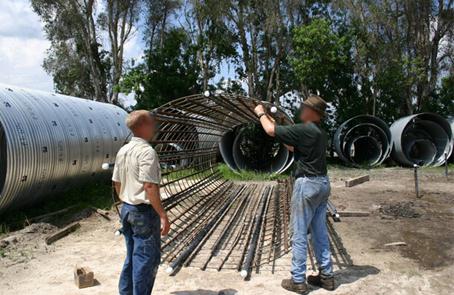
Figure 19. Photo. Voided shaft reinforcement cage instrumentation.
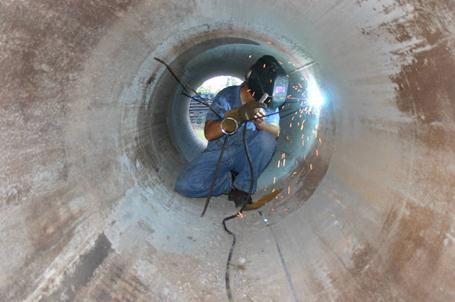
Figure 20. Photo. Voided shaft center casing center tube supports.
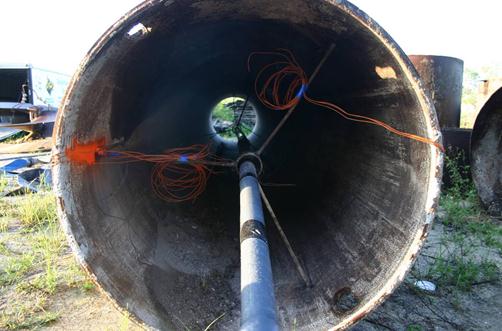
Figure 21. Photo. Voided shaft TCs installed in center casing.
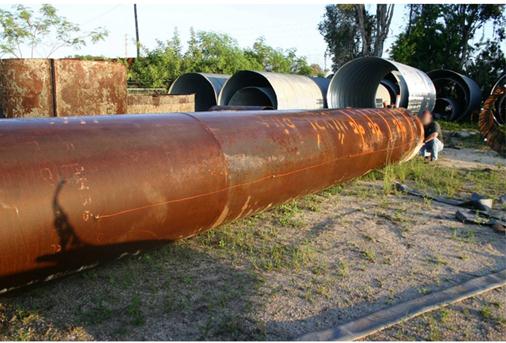
Figure 22. Photo. Voided shaft TCs on outside of center casing.
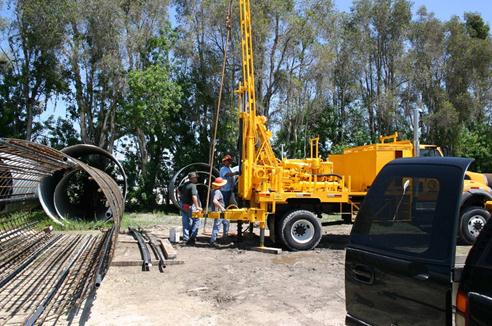
Figure 23. Photo. Voided shaft ground monitoring tube installation.
The voided shaft was constructed at the test site on September 25, 2007. The entire construction process was broadcast via webcam from the USF geotechnical Web page for those who were unable to visit the construction site. Records of the construction sequence, thermal testing, and long-term thermal monitoring were posted and updated every 15 min to http://geotech.eng. usf.edu/voided.html. A 9-ft (2.7-m)-diameter drilled shaft with a 4-ft (1.2-m)-diameter central void was constructed. The first step was the excavation; an oversized surface casing 10 ft (3.05 m) in diameter and 8 ft (2.4 m) in length was embedded 7 ft (2.1 m) into the soil. Excavation was carried out in the dry condition with a 9-ft (2.7-m)-diameter auger for the first several feet. After which, polymer slurry was introduced into the excavation for stabilization. The excavation proceeded without issue to a depth of 25 ft (7.6 m) (see figure 24). A cleanout bucket was used to scrape the bottom of the excavation of debris immediately after the auger and then again after a 30-min wait period.
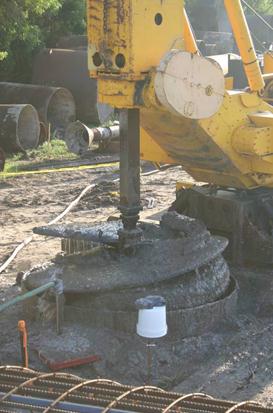
Figure 24. Photo. Excavation for voided shaft.
The reinforcement cage was picked at two locations to avoid excess bending (see figure 25). Locking wheel cage spacers were placed along the length of the reinforcement cage to maintain 6 inches (152.4 mm) of clear cover (see figure 26). The reinforcement cage was hung in place during the pour so that the finished concrete was level with the top of the cage (see figure 27).
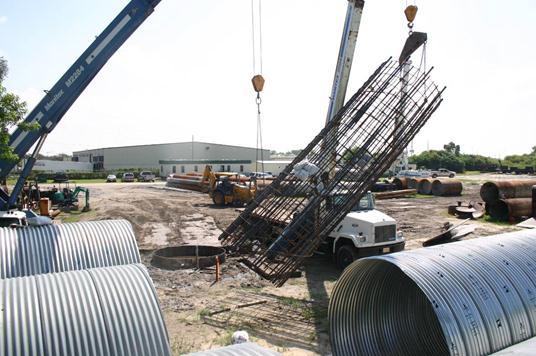
Figure 25. Photo. Picking of reinforcement cage for voided shaft.
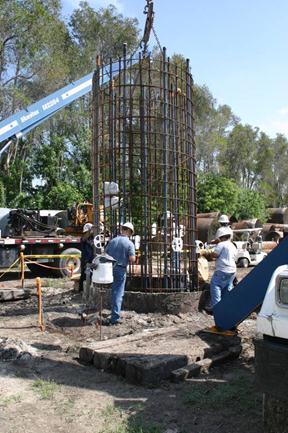
Figure 26. Photo. Placement of reinforcement cage for voided shaft.
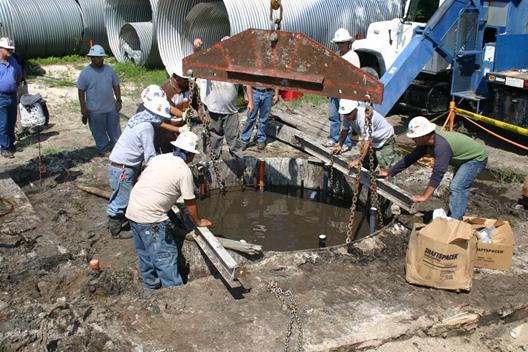
Figure 27. Photo. Hanging of reinforcement cage for voided shaft.
The central casing used to create the full-length void had a 46-inch (1,68.4-mm) outer diameter steel casing that was 30.5 ft (9.3 m) long. It was set into the center of the excavation with a crane (see figure 28 and figure 29). The self weight of the steel casing penetrated the soil to about 3 to 6 inches (76.2 to 152.4 mm). This prevented the concrete from entering the void area. To prevent the top of the inner casing from shifting during the initial concrete pour, a back-hoe bucket was used to hold the top of the casing steady (see figure 30). A double tremie system was used to place the concrete on opposite sides of the excavation (see figure 31). Concrete specifications were a standard 4,000 psi (27,560 kPa) with an 8-inch (203.2-mm) slump and #57 stone mix design. During the concrete placement, concrete level at three points around the shaft was measured to ensure that the concrete was flowing around the void and through the reinforcement cage. The temporary surface casing was removed after final concrete placement (see figure 32 and figure 33).
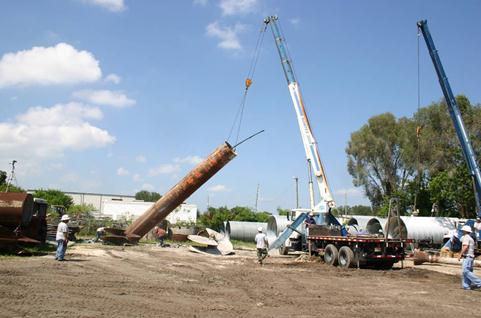
Figure 28. Photo. Picking of central casing for voided shaft.
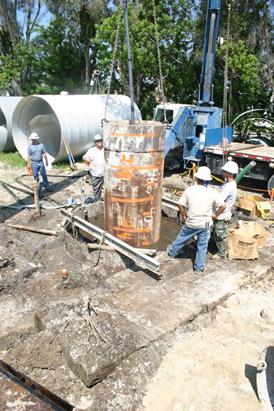
Figure 29. Photo. Placement of central casing for voided shaft.
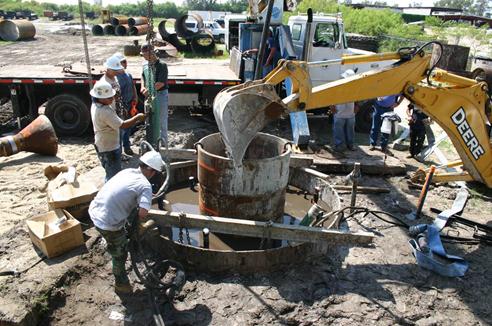
Figure 30. Photo. Holding of central casing steady for voided shaft.
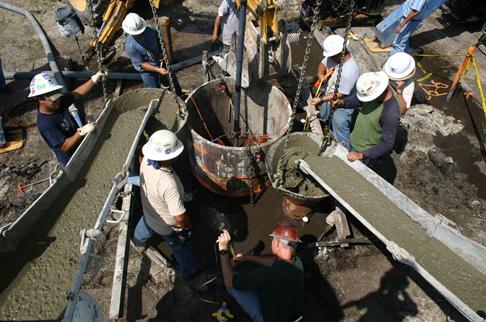
Figure 31. Photo. Double tremie concrete placement of voided shaft.
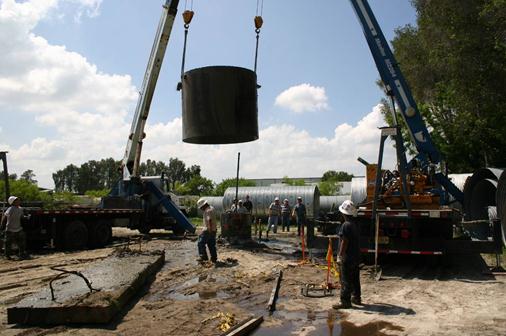
Figure 32. Photo. Voided shaft outer steel casing removal.
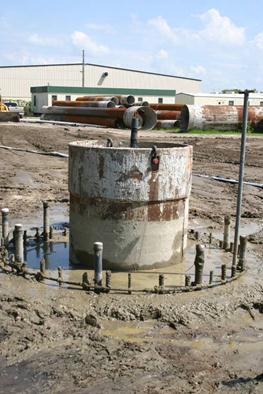
Figure 33. Photo. Final voided shaft at ground level.
MONITORING SYSTEM INSTRUMENTATION AND PROCEDURE
Once the construction of the voided shaft was complete, all of the TC wires were accessed through the tubes so they could be attached to the data collection system. The remote monitoring system was composed of several parts: A Campbell Scientific, Inc.® CR1000 data logger, an AM25T 25-channel multiplexer, a Campbell Scientific, Inc.® Raven100 CDMA AirLink cellular modem, PS100 12-V power supply and 7-Ahr rechargeable battery, a 12W Solar Cell panel from Unidata, and a large environmental enclosure to protect all the materials from the elements (see figure 34 through figure 38). The total cost of the system including all equipment and ongoing services was approximately $4,500. The TC wires were connected to the multiplexer because there were not enough channels on the CR1000 to read all of the TCs. The multiplexer was then connected to the CR1000 (see figure 39). LoggerNet, the remote monitoring and data collection software from Campbell Scientific, Inc.®, was used to program the CR1000 for remote monitoring and data recovery. The data collection system was equipped with the solar panel to help sustain the battery voltage (see figure 40). The system was programmed to wake up every 15 min, take a temperature reading, record it, and go back to sleep. The Raven100 modem was programmed to wake up once every 60 min and transmit the collected data back to the host computer for processing, which was stationed in the Geotechnical Research Group at USF. Sideline measurements of ground temperature for a companion study were taken 1D and 2D away from the shaft via an OMEGA® OM-220 data logger that collected data at the same rate as the CR1000; however, the data were simply stored, and a site visit was required to collect that data. The remote system’s battery voltage was also monitored and sent to the host computer along with the thermal data so that the power consumption could be tracked.
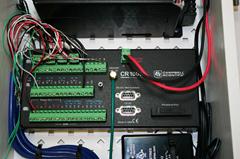
Figure 34. Photo. Campbell Scientific, Inc.® CR1000 data logger.
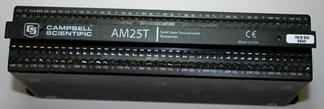
Figure 35. Photo. AM25T 25-channel multiplexer.
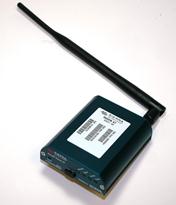
Figure 36. Photo. Campbell Scientific, Inc.® Raven100 CDMA AirLink cellular modem.
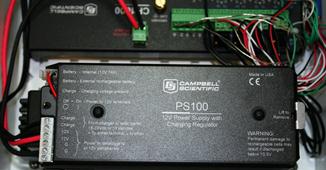
Figure 37. Photo. Campbell Scientific, Inc.® PS100 12-V power supply with rechargeable battery.
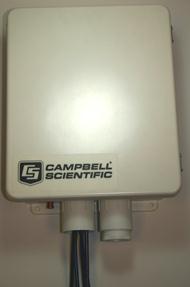
Figure 38. Photo. Campbell Scientific, Inc.® ENC12x14 environmental enclosure.
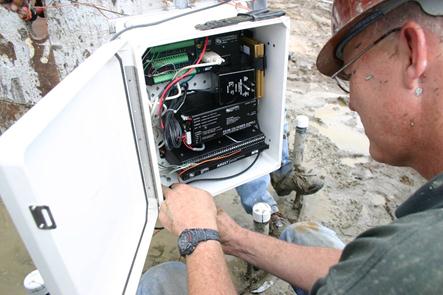
Figure 39. Photo. TC wire connection from AM25t 25-channel multiplexer to CR1000 data logger.
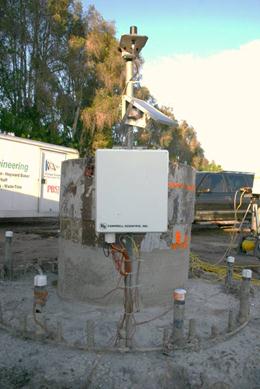
Figure 40. Photo. Remote thermal monitoring system for voided shaft.
Overall, the system worked well. At one point during the monitoring period, there was a cellular timeout, and the modem stopped transmitting the data to the host computer. This was fixed by a site visit to reset the modem, and the problem did not occur again. However, the main problem that was encountered was an issue with power usage. At the beginning of the monitoring procedure, the Raven modem was left on and sent back data every hour, which used a large amount of power, and the system lost power after a few hours (see figure 41). The monitoring procedure was revised so that the modem would go to sleep and only wake up once every hour to transmit the collected data. Even with this alteration, the battery was still losing power relatively quickly. Once the battery voltage dropped below 11.6V, the data collection system had approximately 8 h of life before it quit. Due to this large amount of power usage, three site visits were required to recharge the battery. These visits are seen in the plot of the battery voltage over time (see figure 42). In order to provide a completely remote unit, a larger solar cell was recommended because the 12W did not provide enough power to make the system fully remote.
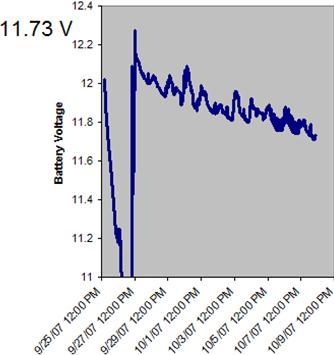
Figure 41. Graph. Battery voltage of thermal monitoring system as of October 8, 2007.
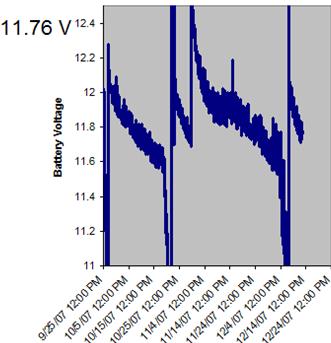
Figure 42. Graph. Battery voltage of thermal monitoring system as of December 14, 2007.
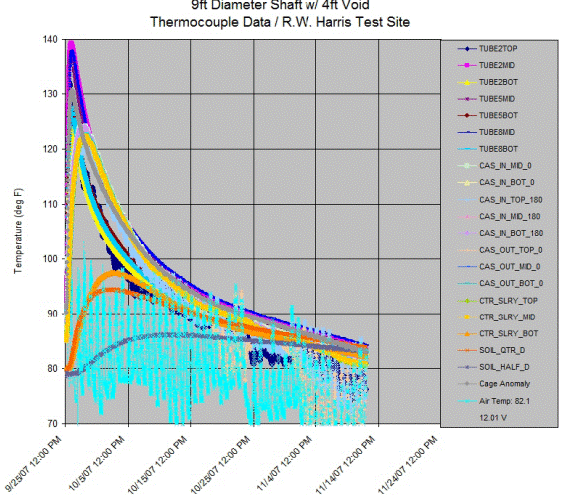
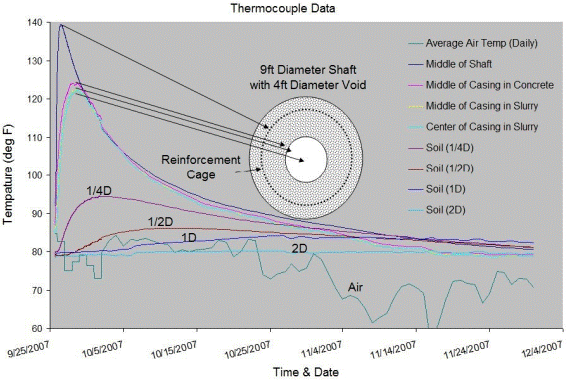
Originally, the data collection period was supposed to last until the temperature in the shaft had reached equilibrium. However, in reviewing the data, the temperatures recorded from the soil surrounding the shaft were increasing while the temperatures within the shaft had reached equilibrium (see figure 43). Therefore, data collection continued for another period of time until it was determined that the temperatures both in the shaft and in the surrounding soil had reached equilibrium. From the final temperature plot, it is evident that the temperature in the soil 1D away from the shaft was the last to eventually reach equilibrium. It can also be seen that the temperature in the soil at 2D away from the shaft was affected only slightly by the heat coming from the shaft (see °f = 1.8(°c) + 32 figure 44).
°F = 1.8(°C) + 32
Figure 43. Graph. TC data from voided shaft as of November 12, 2007.
°F = 1.8(°C) + 32
Figure 44. Graph. Final average TC data for all locations.