U.S. Department of Transportation
Federal Highway Administration
1200 New Jersey Avenue, SE
Washington, DC 20590
202-366-4000
Federal Highway Administration Research and Technology
Coordinating, Developing, and Delivering Highway Transportation Innovations
| REPORT |
| This report is an archived publication and may contain dated technical, contact, and link information |
|
| Publication Number: FHWA-HRT-17-096 Date: October 2017 |
Publication Number: FHWA-HRT-17-096 Date: October 2017 |
Evaluation methodology included synthesis of photographic evidence, a field inspection of the bridge deck surface using a chain drag, physical testing of the UHPC-concrete interface bond according to ASTM C1583—the direct tension bond pull-off test—and visual inspection of the UHPC-concrete interface using scanning electron microscopy.
The first step in the evaluation process was to identify regions of potential delamination along with regions where the bond between the UHPC overlay and substrate concrete appeared intact. The goal was to select bond test locations on both westbound and eastbound lanes, which corresponded to the two construction stages of the overlay. In addition, it was critical to assess regions of potential debonding and regions of apparent intact bond. Curblines of the existing bridge deck prior to overlay installation were not scarified. Thus, there was also interest in assessing the bond strength in these regions where the existing concrete was not roughened prior to installing the overlay.
Prior to arriving on site, photographic data collected prior to the overlay installation was analyzed to identify the pre-existing distressed regions. Two of these regions are shown in chapter 3 as figure 16 and figure 17. Approximate locations of these regions were recorded on a scale model of the Laporte Road bridge that was developed using a commercially available computer-aided drafting (CAD) program.
Once onsite, the bridge deck was inspected using a chain drag to identify regions of potential delamination. These regions were marked on the deck and recorded using a global positioning satellite (GPS)–based mobile mapping unit. This data was mapped on the aforementioned CAD drawing of the Laporte Road bridge. A total of eight potential delamination regions were found. Of these eight regions, two were selected for bond testing; one on the west-bound lane and one on the east-bound lane. Three regions exhibiting intact bond between the UHPC overlay and the underlying concrete deck were also selected for bond testing; one on the westbound land and two on the eastbound lane. The eastbound lane locations included regions with and without scarification prior to the overlay installation.
Figure 22 and figure 23 present the observations, inspection findings, and test locations on the western and eastern sides of the bridge, respectively. Moreover, table 4 lists the findings from the onsite chain drag and details related to each region of interest. Regions of good apparent bond are denoted with a “G,” and regions of potential delamination are denoted with a “B.” Regions of potential delamination were found near the boundaries of the overlay construction stage (i.e., at the longitudinal construction joint or near the approaches) or in close proximity to the distressed regions observed prior to installing the overlay.
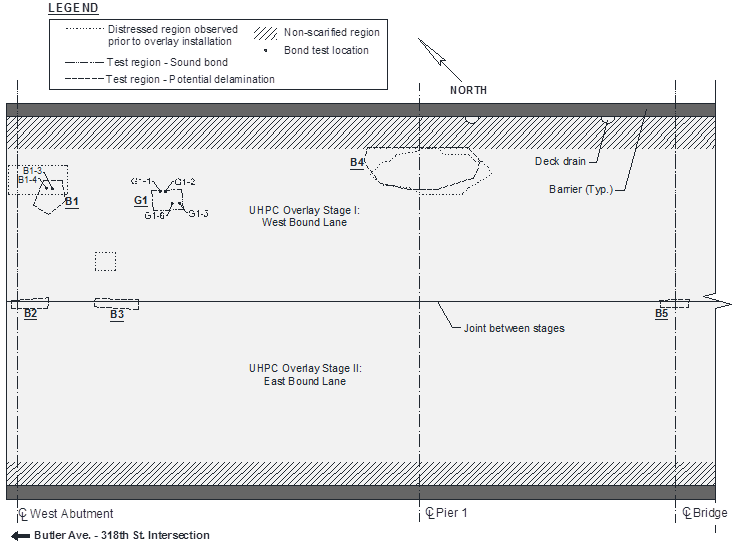
Figure 22. Illustration. Schematic of observations, inspection findings, and test locations on the western side of the bridge.
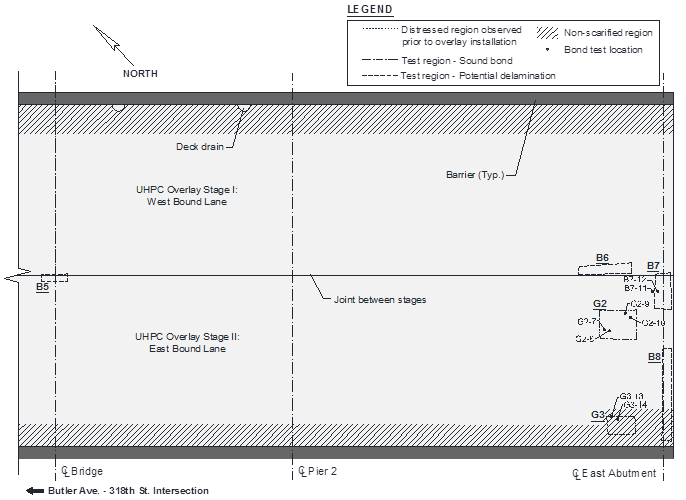
Figure 23. Illustration. Schematic of observations, inspection findings, and test locations on the eastern side of the bridge.
Table 4. Summary of findings from the chain drag and test location details.
| Location ID | Lane (Construction Stage) | Potential Delamination | Existing Distressed Concrete† | Scarified Substrate | Bond Testing | Number of Pull-off Tests | SEM Analysis |
|---|---|---|---|---|---|---|---|
| G1 | Westbound (I) | No | No | Yes | Yes | 4 | No |
| G2 | Eastbound (II) | No | No | Yes | Yes | 4 | Yes |
| G3 | Eastbound (II) | No | No | No | Yes | 2 | Yes |
| B1 | Westbound (I) | Yes | Yes | Yes | Yes | 2 | No |
| B2 | Westbound (I) and Eastbound (II)* | Yes | No | Yes | No | — | — |
| B3 | Westbound (I) and Eastbound (II)* | Yes | No | Yes | No | — | — |
| B4 | Westbound (I) | Yes | Yes | Yes | No | — | — |
| B5 | Westbound (I) and Eastbound (II)* | Yes | No | Yes | No | — | –— |
| B6 | Eastbound (II) | Yes | No | Yes | No | — | — |
| B7 | Eastbound (II) | Yes | No | Yes | Yes | 2 | Yes |
| B8 | Eastbound (II) | Yes | No | Yes | No | — | — |
| * Region was along the construction joint between construction stages. † As determined by photographic evidence. —Not applicable. |
|||||||
The interface bond strength between the existing concrete deck and the UHPC overlay material was assessed using the direct tension bond pull-off test method. A schematic of this test, which was conducted according to ASTM C1583 (ASTM C1583/C1583M-13 2013), is shown in
figure 24.

Figure 24. Illustration. Direct tension pull-off bond test based on ASTM C1583.
This test was prepared by first gluing a 2-in (51-mm) diameter steel pull-off disc to the bonded material at the desired test location; here, the “bonded” material is the UHPC overlay, and the substrate is the underlying deck concrete. Prior to gluing the pull-off disc, the bonded surface was roughened to promote bonding between the steel disc and the UHPC overlay. Once the adhesive layer cured, a partial core was drilled through the bonded material and into the substrate material. This ensured that the load path passed directly through the interface between the two materials. For this project, the substrate core depth was approximately 1 in (25 mm) as shown in figure 24. A specialized pull-off test fixture was then used to apply load and record data according to the ASTM C1583 standard. Tensile load was applied to the steel disc at a constant rate of 5 ± 2 psi/sec (34.5 ± 13.8 kPa/sec) until failure. The failure load and failure mode were recorded on completion of the test. The nominal tensile stress could then be calculated.
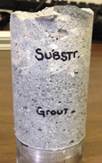
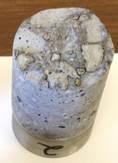
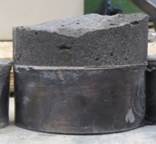
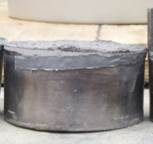
Typically, failure occurred by one of four modes, which are shown in Figure 25. These photos were taken from previous projects where this test was employed. If Mode 2 failure occurred (Figure 25-B) the true bond strength between the two materials could be assessed. If Mode 1 (Figure 25-A) or 3 (Figure 25-C) occurred, the tensile strength of the failing material could be assessed and the interface bond strength recognized to be higher than the tensile stress achieved. Finally, if Mode 4 failure occurred (Figure 25-D), the interface bond strength could be recognized to be higher than the tensile stress achieved.
 |
 |
 |
 |
| A. Mode 1: Substrate failure. |
B. Mode 2: Bond failure at the interface. |
C. Mode 3: Failure in the bonded material. |
D. Mode 4: Failure in the disc adhesive. |
Figure 25. Photos. Failure modes associated with the direct tension pull-off bond test; photos taken from previous projects.
These tests were completed over the course of two days in November 2016. On day one, air temperature was between 40 °F (4.5 °C) and 50 °F (10 °C), and the bridge deck surface was damp. On day two, air temperature was also the between 40 °F (4.5°C) and 50°F (10°C), but the deck surface was dry. A specially formulated two-part adhesive was used to secure the pull-off disc to the UHPC overlay. A heat gun was used to dry the deck surface prior to pull-off disc installation and was also used to accelerate adhesive curing (shown in figure 26). Figure 26 and Figure 27 show photos from test preparation and the bond testing, and figure 28 shows a set of samples after testing.
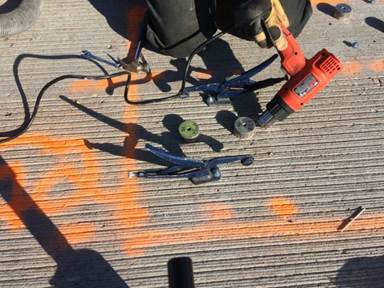
Figure 26. Photo. In-situ bond testing on the Laporte Road bridge.
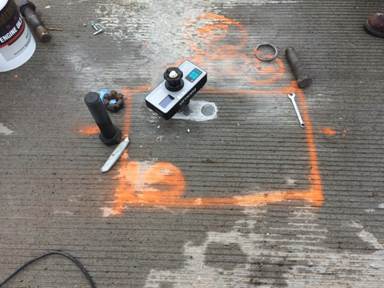
Figure 27. Photo. Preparation of the bond test location on the Laporte Road bridge.
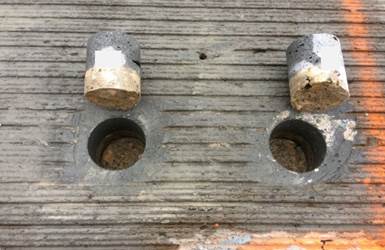
Figure 28. Photo. Two test samples after failure in the substrate concrete.
After onsite bond testing, all cores were brought to TFHRC for documentation and potential future testing. Three bond test specimen cores were selected for detailed microstructural analysis using a scanning electron microscope (SEM). The goal of microstructural analysis was to further investigate the interface between the UHPC overlay and the substrate concrete deck. Selected cores were taken from test locations G2, G3, and B7 as noted in table 4. To prepare SEM specimens, 1.77-in by 1-in (45-mm by 25-mm) samples were cut from each of the three cores of interest; each sample included the interface between the two materials. These samples were immersed in isopropanol for 48 hours, dried in a vacuum oven at 77 oF (25oC), impregnated with epoxy resin, lapped, and polished to a surface roughness of 0.25 μm.
Microstructural analysis of the selected interface samples was done using a FEI Quanta 650 SEM equipped with a concentric backscatter detector. The microscope was operated under high vacuum at 15 KV and with a 0.39-in (10 mm) working distance. Large backscatter electron (BSE) mapping areas were collected using Aztec 2.4 EDS microanalysis software. The entire surface of the interface was mapped at two magnifications. First, a magnification of 150x was selected to obtain a general view of the fiber and entrapped air distributions near interface, referred as “General” maps. Under this magnification, the entire interface was mapped with two General maps measuring approximately 0.9-in by 0.26-in (23.0 mm by 6.5 mm). The interface was mapped a second time with 1500x magnification to analyze distribution of porosity, aggregate, unhydrated cement particles, and UHPC hydration products in proximity to the UHPC-concrete interface. These maps are referred as “Quantitative” maps. Five Quantitative maps measuring approximately 0.31-in by 0.1-in (8.0 mm by 2.5 mm) were required to fully map the interface at the 1500x magnification.
The interface was analyzed in consecutive 10-μm-wide bands, starting from the location where UHPC’s cement paste contacted the concrete deck substrate. This is illustrated in figure 29. This analysis was conducted 10 times, moving backward into the bulk of the UHPC paste (100 μm away from the interface line). A similar process was used to characterize the interfacial transition zone in cement-based materials. (Diamond and Huang 2001; Elsharief, Cohen, and Olek 2003) This process is currently being used by researchers at TFHRC to characterize bond between fresh cementitious materials and existing concrete, and was previously used by Beushausen, Höhlig, and Talotti (2017) to characterize the microstructure of bonded concrete overlays.

Figure 29. Illustration. Example of segmentation process on Quantitative map with 10-μm-
wide bands used to study the distribution of porosity, aggregate, and unhydrated cement
particles of the UHPC-concrete interface.
Image analysis software ImageJ 1.49v1 was used to measure porosity, aggregate, and unhydrated cement particles in each of the 10-μm-wide bands. The result of this analysis is a quantitative measure of the porosity, aggregate, hydration products, and unhydrated cement particle content near the interface. Specific details of the process to measure porosity are described in Beyene et al. (2017).