U.S. Department of Transportation
Federal Highway Administration
1200 New Jersey Avenue, SE
Washington, DC 20590
202-366-4000
Federal Highway Administration Research and Technology
Coordinating, Developing, and Delivering Highway Transportation Innovations
| REPORT |
| This report is an archived publication and may contain dated technical, contact, and link information |
|
| Publication Number: FHWA-HRT-17-054 Date: October 2017 |
Publication Number: FHWA-HRT-17-054 Date: October 2017 |
Physical modeling was conducted at the Turner-Fairbank Highway Research Center (TFHRC) to provide a dataset for validation of the numerical modeling described in chapter 4. TFHRC designed and conducted a laboratory experiment of a vertical-wall abutment that encroaches into the channel at a scale of 1:18 (model:prototype).
A flume with transparent glass side walls and a width, depth, and length of 6 ft, 1.8 ft, and 70 ft (1.83 m, 0.55 m, and 21.35 m), respectively, was used to conduct the experiments. The flume recirculated water and could be tilted to create a variety of flow conditions. A schematic drawing of the flume is presented in figure 2.
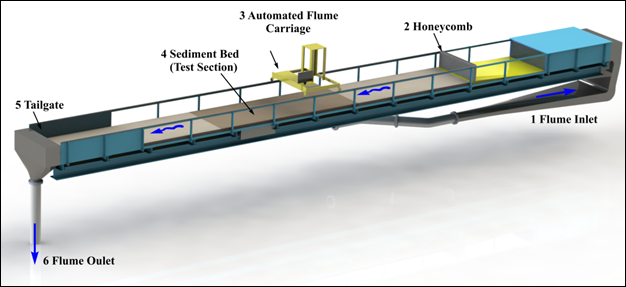
Figure 2. Illustration. FHWA tilting flume.
The flume’s skeleton was composed of U-shaped lateral steel frames supported on box-sectioned longitudinal girders. A walkway was provided on one side of the structure. Water was supplied to the flume by a circulation system with a sump of 7400 ft3 (210 m3) and a pump with a maximum capacity of 10.6 ft3/s (0.3 m3/s). The discharge was measured by an electromagnetic flowmeter before the flow was introduced to an upstream head box equipped with a screen and filter. Rapid development of a fully turbulent boundary layer was achieved through an upstream ramp followed by a honeycomb mesh as a flow straightener and an upstream transition zone composed of a layer of coarse sediments carefully placed on the flume bed to provide excess friction. The flow depth was regulated through a computer-operated adjustable tail gate.
Figure 3 shows the flume instrumented with an automated three-axis positioning system with traversing capability for the entire length, width, and height of the flume at a 0.039 inches (1 mm) resolution. This carriage can position probes at any location within the test section to make point velocity measurements using an Acoustic Doppler Velocimeter (ADV) (shown in figure 4) and to characterize bed surface bathymetry using a laser-distance sensor.
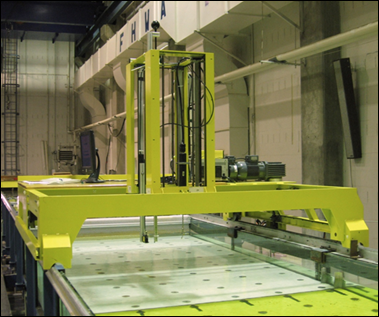
Figure 3. Photo. Automated flume carriage in the TFHRC Hydraulics Laboratory.
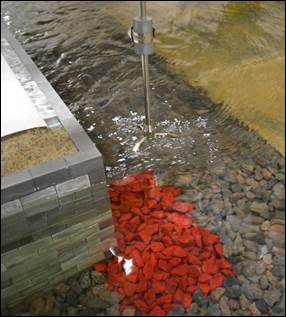
Figure 4. Photo. ADV probe.
Figure 5 and figure 6 show plan and cross-section views, respectively, of the experimental layout in the test section. The approach channel width (W1) was 6 ft (1.83 m) and the contracted (bridge opening) width (W2) was 3.87 ft (1.18 m). Identical geometry vertical-wall abutments with an abutment length (l1) of 2.23 ft (0.68 m) and abutment width (l2) of 1.07 ft (0.325 m) were placed on each side of the flume. The approach velocity (V1), approach flow depth (y1), the contracted section velocity (V2), and the contracted flow depth (y2) are also shown on the figures. One abutment was constructed of a transparent material to allow recording of rock movement.
A riprap apron was installed flush with the fixed channel bed around both vertical-wall abutments per HEC-23 Design Guideline (DG) 14.(1) The average rock layer protrusion exposed to the flow was 10 to 15 percent of the D50. The riprap apron layer thickness (t) was two times the D50 of 0.67 inches (17 mm), which was estimated using HEC-23 DG 14. The riprap apron extent (WR) was two times the flow depth in all directions as recommended by HEC-23 DG 14.
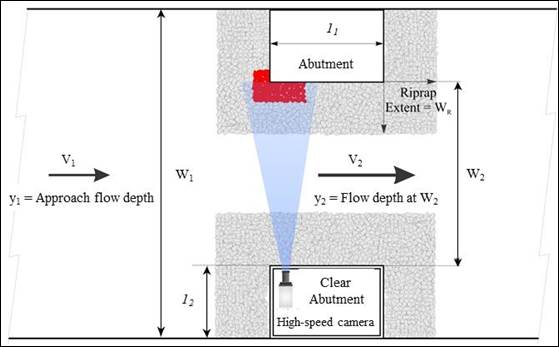
Figure 5. Sketch. Plan view of the test section.
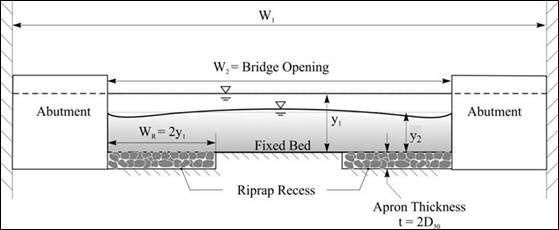
Figure 6. Sketch. Cross-section view of the test section.
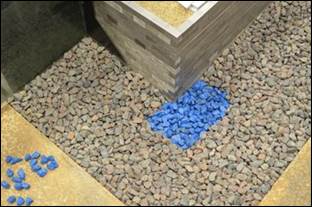
In addition, rocks around the upstream corner of the * first abutment were colored with a lighter color (blue) for the bottom first layer and a darker color (red) for the top second layer as shown in figure 7. Figure 8 shows the installation before testing. The colored rocks were placed in the potential “failure zone” based on observations and measurements from experiments conducted by Pagán-Ortiz.(7)
*Revised 10/17/18
 |
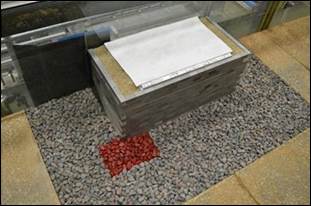 |
Figure 7. Photos. Riprap installation.
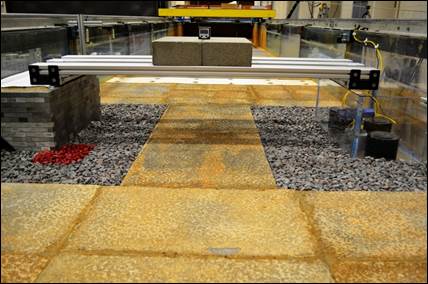
Figure 8. Photo. Riprap apron installation for testing.
The experimental procedure was designed to identify the conditions for incipient motion of the riprap and to assess the nature of the riprap apron after failure.
Incipient motion of individual rocks was monitored and recorded with a high-speed camera that was positioned inside the transparent abutment as shown in figure 5. The recording frame rate varied within the range of 62 to125 ft/s (18.9 to 38.1 m/s). The velocity was increased stepwise at very small increments. During this process, the approach flow depth remained constant at 0.56 ft (0.17 m) for all runs, although small fluctuations in the flow depth were impossible to avoid as the velocity increased. When incipient motion of the riprap was detected, the approach velocity that caused the shear failure was maintained for a period of 4h at which time the test was concluded.
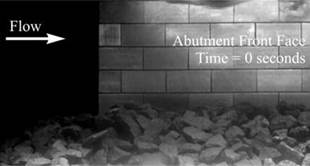
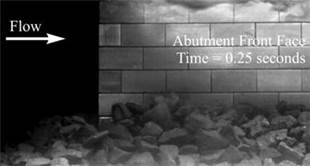
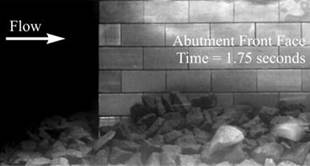
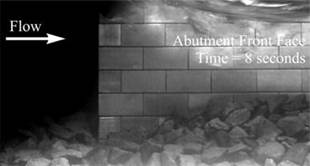
Figure 9 shows a failure sequence for one of the runs with the flush apron installation around the abutment that was used for the comparison with the numerical modeling approach that is described in chapter 4. Figure 10 shows another example with the riprap installed at a slope of 1V:2H against the front face of the abutment using the same riprap size and the same upstream flow depth.
A laser distance sensor was used to scan the bathymetry of the riprap apron to characterize the failure zone around the abutment. Figure 11 shows an isometric view of the surface mapping results after shear incipient motion failure of the first layer of rocks at the upstream corner of the abutment.
Figure 12 shows the same run with the painted rocks clearly outside the area in which they were placed. The results for all runs confirmed that the rock incipient failure zone was located at the upstream corner of the vertical-wall abutment. The tests also showed that the majority of the entrained rock settled downstream along and near the abutment front face.
The experiments were conducted with a range of approach velocities as summarized in table 1. In all cases the approach flow depth was 0.56 ft (0.17 m). During the experiments, only the upstream average velocities were recorded to avoid any interference with the ADV probe submerged in the contracted (bridge opening) section. The average velocity in the contracted section was estimated using conservation of mass.
As can be seen in table 1, at the lowest velocity, the rocks appeared stable. With increasing velocity, some shaking was observed but no movement. At the three experiments with the highest approach velocities, shear failure was observed.
Table 1. Flow conditions for flume experiments.
| Measured Upstream Velocity, ft/s (m/s) |
Estimated Average Velocity in Contraction, ft/s (m/s) |
Froude Number in the Contraction |
High Speed Camera Recordings |
|---|---|---|---|
| 0.89 (0.27) | 1.71 (0.52) | 0.44 | Rocks stable |
| 1.18 (0.36) | 2.33 (0.71) | 0.62 | Some rocks shaking, but no entrainment observed |
| 1.25 (0.38) | 2.40 (0.73) | 0.64 | |
| 1.28 (0.39) | 2.49 (0.76) | 0.66 | |
| 1.38 (0.42) | 2.66 (0.81) | 0.70 | Shear failure, rocks moved |
| 1.44 (0.44) | 2.82 (0.86) | 0.75 |
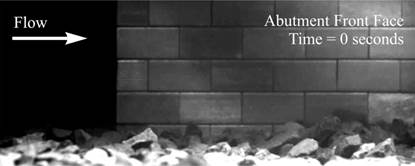 |
| A. Time equals 0 seconds. |
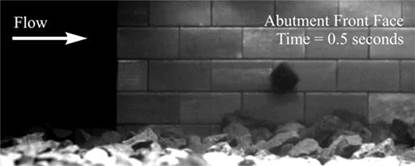 |
| B. Time equals 0.5 seconds. |
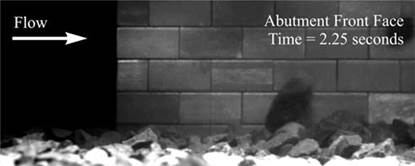 |
| C. Time equals 2.25 seconds. |
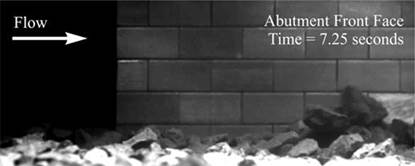 |
| D. Time equals 7.25 seconds. |
Figure 9. Photos. Shear failure sequence for riprap apron installed flush with channel bed.
 |
 |
| A. Time equals 0 seconds. | B. Time equals 0.25 seconds. |
 |
 |
| C. Time equals 1.75 seconds. | D. Time equals 8 seconds. |
Figure 10. Photos. Shear failure sequence for riprap installed on a slope against the abutment face.
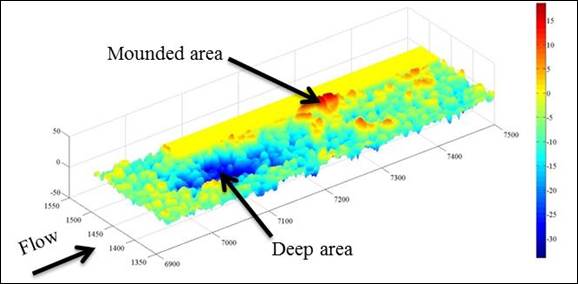
Figure 11. Graphic. Bathymetry of the riprap apron after failure in isometric view.
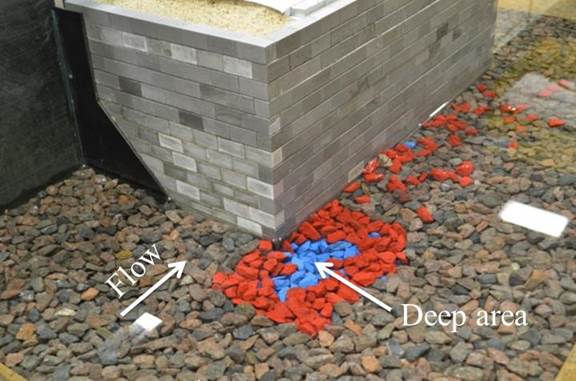
Figure 12. Photo. After rock shear failure at the upstream corner of the abutment.